How to install Debian 11 on a VMware workstation?
Want to install Debian 11 on a VMware workstation but struggling hard? Then do read the below article. As i know this will definitely solve all your queries. So starting with a basic introduction.
Also you can learn about linux by clicking the link below
Introduction
One of the most reliable Linux distributions available is Debian. The Debian OS won’t receive regular upgrades as other distros do. But when it does, it is quite stable.
Virtualizing any operating system is the most effective technique to utilize both Windows and Debian concurrently. You may set up Debian 11 and the KVM packages on your computer. Following that, you may create a virtual computer and install Windows 11. Instead, you may set up Windows 11 as your main operating system, turn on Windows’ inbuilt hypervisor (hyper-v), and install Debian 11 as a virtual machine inside of it. Whilst installing Debian 11 on the VMware Workstation is conceivable and excellent, for some customers who use VMware Workstations as their hypervisor it’s possible and works great.
In this article, let’s look at how to install Debian operating system 11 on the VMware workstation.
Build a Debian 11 Virtual Machine
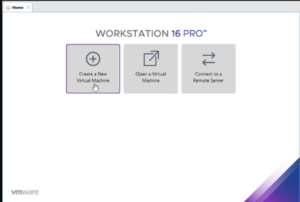
Click “Build a new virtual machine” after launching the VMware workstation. For this, you may also use CTRL+N.
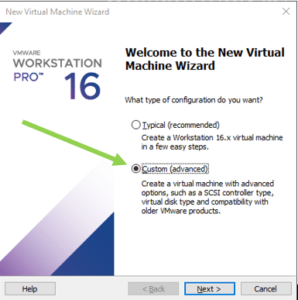
The wizard for creating a new virtual machine will launch. We will select the Custom option and go on to the next step to have greater control over the Debian virtual machine installation.
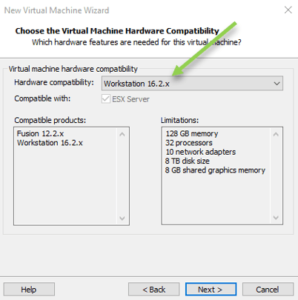
Version 16.2 of VMware Workstation is utilized. Hence, you may use the most recent edition of the VMware workstation you are using as long as your hardware allows it and click Next.
Attachment of the ISO image
The Debian 11 ISO image has already been obtained from the official website. The ISO image file has to be pointed out here. When asked to upload the Debian 11 ISO file, choose the Installer disc image file and click Browse. You’ll also see that it identified Debian 11 as the operating system automatically.
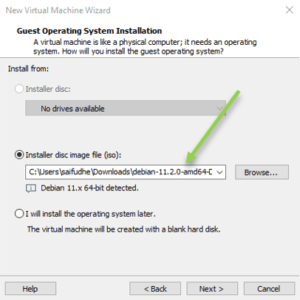
Then click next
Name and select the location.
The operating system the VMware workstation was used by default to select a name for the machine. You may give the Debian VM a simple name that will help you recognize it easily. If not, you can stick with the default.
Choose the location where you want to save the virtual machine files. By your choice, you may either select the default or modify it.
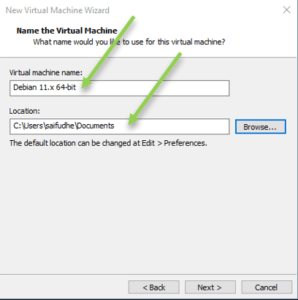
When you’ve decided, click next.
Set the CPU up
At least two CPUs are recommended for excellent performance, and more CPUs may be needed if you want to undertake more processor-intensive tasks. You may thus set the CPU by your needs.

Then press the click button.
Set up the memory
For light usage, the 2GB of standard memory should be plenty, but if you want to utilize additional programs, you should think about adding extra RAM. We decided to use 2 GB of RAM.
If necessary, I can subsequently modify the memory.
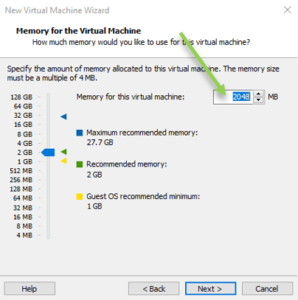
Press the next button.
Debian 11 network configuration
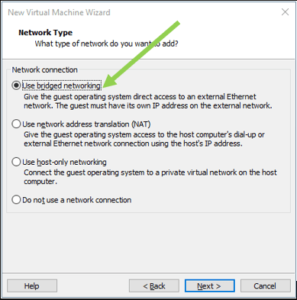
Most users may continue using the VMware workstation for Debian 11’s default NAT network connection. Only internet access will function with the NAT network. You cannot use NAT to allow anyone on your local area network to communicate with the virtual machine.
The Debian virtual machine will become a part of the local area network if you choose a bridged network, and your LAN DHCP server will then provide it with an IP address. If you desire your LAN users to communicate with the VM and access the internet, it is beneficial.
Nevertheless, it is advised against using the bridged option in office networks as it is likely against corporate policy to connect a virtual computer to the LAN network.
clicked on Next after choosing bridged.
Set up Debian’s virtual machine’s virtual hard drive
Your virtual computer also needs a hard disc to hold the data, just like the actual operating system does. The VMware workstation’s virtual hard disc will now be set up for Debian 11 at this point.
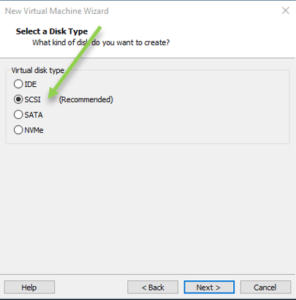
Choose LIS Logic as the I/O controller Type
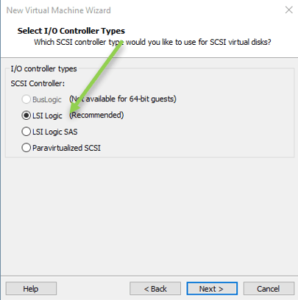
Click on Next after selecting SCSI as the virtual disc type.
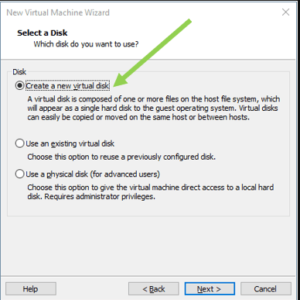
Choose “create new virtual disc” to start a new virtual drive.
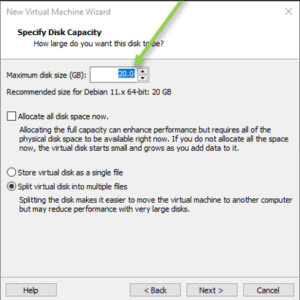
Debian 11 suggests 20GB of storage, so you may select the storage, and select Divide the virtual drive into many files.
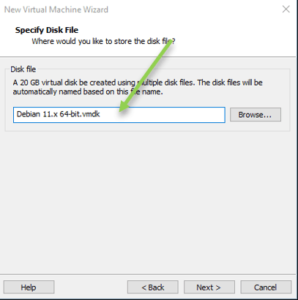
You may opt to explore and store the virtual hard drive in various locations if you’d like, or you can leave the default location and click on next after creating the virtual hard disc for the Debian 11 virtual system.
An overview of the virtual machine settings would be given to you. You may alter anything by selecting the Configure hardware button. You may select “Finish” at this time.
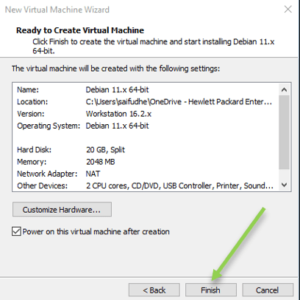
Install the Debian 11 virtual machine
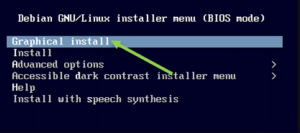
The Debian 11 iso will begin to boot and begin the installation after a brief period. Press enters to select “Graphical Install” on the installation screen.
Set up the items below.
- Choose your language
- Your location.
- Set up the keyboard
After your decision, the installation will launch.
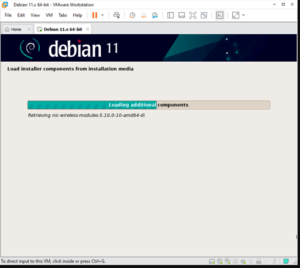
Click Proceed after configuring the hostname and domain. You can leave it empty and carry out the installation if there is no DNS name.
Establish root account
The root account will be automatically established with Debian; however, you must specify the root account password during installation. If you want to edit any files that require root access, you’ll need this account.
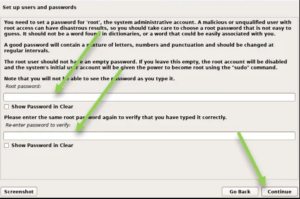
Create a standard user account
After configuring the root account in the preceding step, we will now set up a standard user account in Debian.
To proceed, provide the new user’s full name.
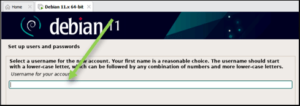
the username you use. By entering this username and clicking next, you may access the system.
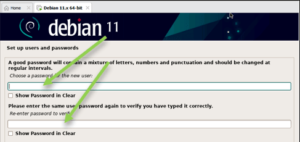
After that, enter a password for the primary account and click Proceed.
You must select your time zone in the Debian clock settings. Then press enter.
Disk partitioning
We’re going to select the option for Guided-use whole disc. You may choose manual and then choose storage for each segment, such as root, home, and swap if you want to manually configure the hard drive to meet your needs.
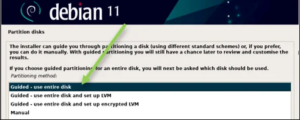
Press enters after selection.
The virtual hard disc we previously configured will be available for selection; choose it then click Proceed.

We may choose All Items in One Partition without dividing the partition. And press enter.
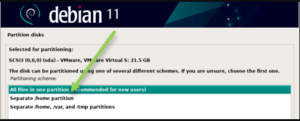
Make sure it looks fine when you see the summary of the partition’s configuration on the next screen.
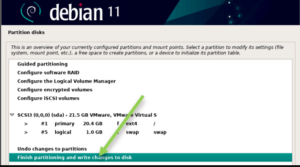
Choose yes to selecting the option to write changes to the disc. And press enter.
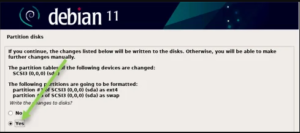
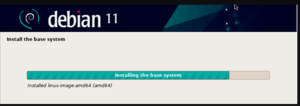
The installation of Debian 11 will now start, and it will take several time to finish.
Set the package manager up
Select no from the scan additional installation media menu. And click on the next button.
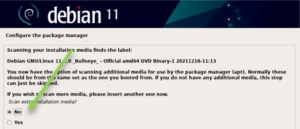
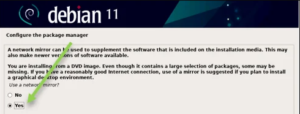
Select yes under the network mirror option.
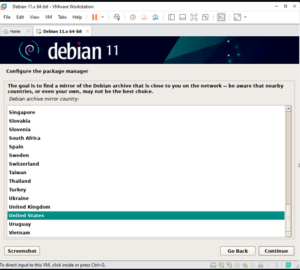
Select the area of your choosing. Always choose the mirror closest to you since if you choose a location farthest from your location, the package upgrade will take longer.
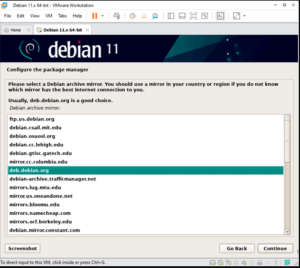
There are several possibilities in the Debian archive mirror; it is advised that you use deb.debian.org
And click continue
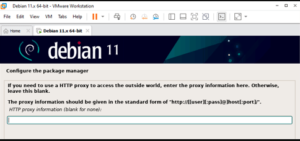
If you use a proxy to access the internet, you can enter it here; otherwise, you can leave the box empty.
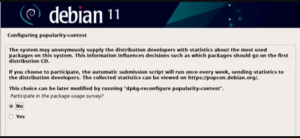
Choose whether to enter a contest for online popularity; I’ll say no.
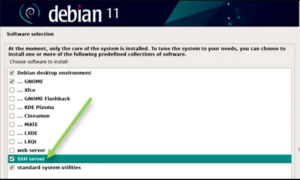
Selection of Software
You will be prompted to decide on the kind of software you want to install on the server. I’ve checked the SSH server option in addition to the default choice. As a result, I would always be able to ssh into the Debian system.
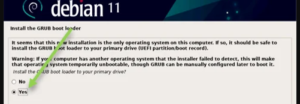
Select yes to install the grub boot loader and click continue.
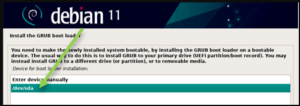
As the installation location for the grub boot loader, select the automatically suggested place.
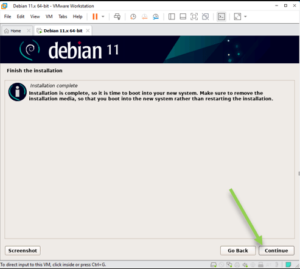
The installation is finally finished. To finish the installation and restart the Debian 11 os, select Continue.
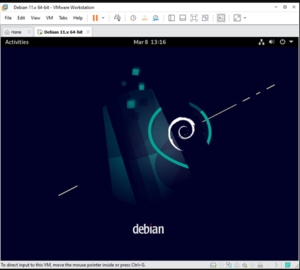
As we can see, we were successful in installing the Debian 11 operating system on the VMware Workstation. The installation of the VMware Workstation tools will be the final task.
Installation of VMware workstation tools
When you set up Debian 11 on the VMware workstation, the VMware tools will immediately be installed. Run the command to find out what version of VMware Workstation is currently installed on your computer.
root@gld-debian-01:~# vmware-toolbox-cmd -v 11.2.5.26209 (build-17337674) root@gld-debian-01:~#
Check the network connectivity
My Debian 11 virtual machines received an IP address of 192.168.0.138 from my neighbor’s DHCP server when connected to my LAN network, which has a subnet of 192.168.0.0/24. At this stage, if you’re wondering why your virtual machine didn’t receive an IP address, you’ll need to troubleshoot it. Follow the instructions in this article to quickly solve it.
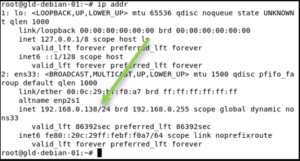
View outgoing connections
By using the internet or pinging a different host inside your LAN network, you may determine how secure the outbound access is. When I ping the google domain, I receive a response, indicating that my virtual machine may leave the network.

Examine the inbound connections
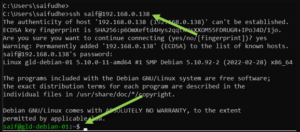
The inbound access won’t function if the NAT interface is being used. You may ping or ssh into the virtual computer to check the inbound access.
As you can see, the Debian virtual machine is operational once I ssh’d into it.
Final Words
Operating systems can be virtualized using VMware Workstation, the company’s foundational product.
You may playfully configure virtual machines using the VMware Player. The use of the program is also widespread in the private sector.
VMware Workstation Player and VMware Workstation Pro are the two distinct versions that are included. Workstation Pro includes sophisticated functionality and requires a license key beyond the 30-day trial period, whilst the former is utilized for non-commercial purposes and provides basic VMware functionalities.
Don’t forget to read another article on How to install Debian 11
