How to install Debian 11
Want to install Debian 11 in a right way? Say less. So let’s get ready to install debian 11 in an easiest and the rightest way possible.
Introduction of Debian 11
After a two-year hiatus, Debian has finally released version 11. “Bullseye” is the code name for Debian 11. Debian 11 is an LTS i.e., Long Term Support release, which means updates are available after some time gaps until 2025. The theme of Debian 11 is Homeworld. A Debian distribution consists of numerous software packages that may perform a wide range of tasks. Every package contains the necessary scripts, executables, configuration data, and documentation to deliver pre-compiled software that can be quickly installed and used on a Debian machine.
System Requirements for Debian 11
Before we begin the installation steps, here are the items you require.
- at least 4 GB of USB
- internet connection with a computer system
- computer system where you’ll be installing Debian. It will erase everything, so copy your data to any USB.
- RAM must be at least 2 GB.
- Dual Core Processor (or higher)
- Hard drive with 25 GB of space
The system requirements are determined by the desktop environment you intend to use. like, the GNOME computer works on 4 GB of RAM but 8 GB RAM works much better. with 4 GB RAM, try using KDE, Cinnamon, or Xfce desktops.
Debian support 32-Bit and 64-Bit architecture. Choose your Debian ISO according to your processor architecture.
Following are the steps on how to install debian 11.
-
Finding the right Debian ISO
Installing Debian can be simple or difficult depending on the ISO you use.
By selecting the correct ISO, you have completed half of your work. We will have difficulty installing Debian if we use the default ISO provided by Debian. The minimal net install file will be selected if you choose to download it from the Debian website’s homepage. Don’t use it because it’s difficult for regular users.
Download the ISO file from the official website of Debian. After downloading iOS, you burn it to a USB to make it bootable. It’s known as Installation Media.
You can download the Iso file from the below link.
https://www.debian.org/CD/http-ftp/
-
Making a Debian live USB
Insert the USB into the computer and format it.
Select a USB creation program. For Windows, Rufus is best. Etcher is also available here because it is available for Windows and Linux.
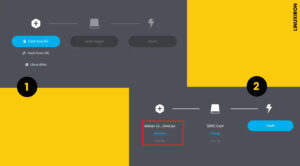
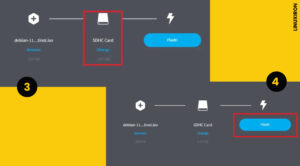
Download the Etcher file and run it, navigate to the Debian ISO, select the appropriate USB, and then press the Flash button.
It will take a few minutes to prepare the live USB. When it’s finished, put it to use.
-
Boot System with Installation of Media
After the reboot process, we should now have Debian 11 installed, the next step is to go to BIOS settings and from the hard disc options change the boot medium to bootable media. These bootable mediums can be USB or DVD.
After the boot process, the screen opens like this.
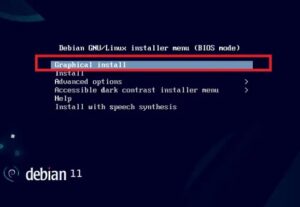
select the “Graphical Install” option, and press enter.
-
Select Language
After doing the above procedure it’s time to select the language that will be followed for the next process. It will be the default language for the next process. After making a selection, press the enter key to proceed to the next step.
-
Select your Location
To change the time zone for your system you need to select the location from the options. Select the country, in which you are living, for the location. The provided locations will be short-listed according to the language but if you didn’t find the option select the other option and choose the location.
-
Choose Layout Keyboard
Now, choose a keyboard from the list. Choose the appropriate keyboard for your location.

and press Continue for the next setup.
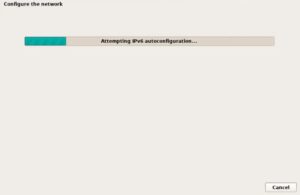
-
Configure hostname and Domain
Now the installer will ask for a hostname, select the hostname according to your choice, and then click on “continue.”
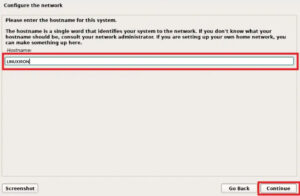
The selected hostname will give your identity to the network. In case you do not find your hostname, you can get it from the network administrator.
The domain name is specified on the following screen after pressing enter.
That domain name will be part of the internet address that will be shown on the right of the hostname. It’s often followed by characters.com, .net, Edu, or.org.
-
Password set for the Root User
We need a password for the root system administration account. An unqualified user with root access can have disastrous consequences. Therefore, you should carefully choose passwords that are difficult to guess. It should not appear in the dictionary or not the information that is related to you because it can be easily guessed.
A password consists of numbers and letters that you can change easily according to your needs.
The field of the root user always required a password you cannot leave the field empty because it will result in a disabled account. Once the account is disabled, the authority will be given to the initial account of the system by writing the sudo command.
-
Create a Local User and Build its Password
Give your local user’s full name.
Instead of the root account, user accounts are created for non-administrative activities.
Enter the user’s real name. This data is used as the de facto source of emails sent by that user and programs that display or use the user’s real name. Your full name is the best choice. Lowercase letters should be the priority for writing the passwords.
A good password contains a mixture of letters, numbers, and punctuation marks and should be changed regularly. Enter the same password again to ensure you typed it correctly the first time.
-
Choose an Apportionment Method
The installer will prompt you to select an apportionment method during this step.
Use the entire disc if possible. (A partition will be created on the entire disk.)
Use the complete disc and build LVM, the partitions that are LVM-based will automatically be created on the disc.
Use the entire disc if possible. (A partition will be created on the entire disk.)
Use the complete disc and build LVM, the partitions that are LVM-based will automatically be created on the disc.
Use the whole disc and go for the encrypted LVM option, the partitions that are LVM-based will encrypt the disk.
Custom partitions will be created manually.
After this, a screen appears, as shown below. Select a suitable option for your installation.
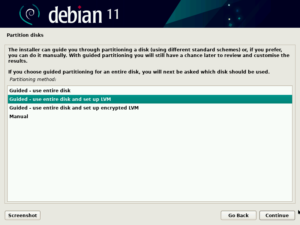
Press enters for the next setup.
Select the disc on which Debian 11 allocation will be built using the next setup.
The selected data on the disk will be erased after your confirmation.
Then, choose an apportionment scheme. Choose the apportionment scheme according to your disc size and requirements,
Select one of the options on the screen below.

Press enters to continue.

Click on “Yes” to make changes to the disc and press Enter.
On the next screen, go for the disc size that would be your choice for the Debian 11 portioning.
You can use the whole volume group or part of it for partitioning. The maximum size of the disk is 8.3 gigabytes. The maximum available is 42.4 GB.
after clicking “continue.” On the new screen, to write changes to the disk, and verified the available partition summary, verify it, and choose “Yes.”
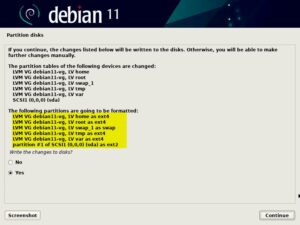
Press continues to next.
-
Installation Begins
Debian 11 installation begins in this setup.
A few minutes later, it will provide the options for canning the installation media, Select “no” and select the option of “Continue” to go for the further process.
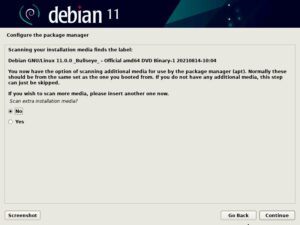
To proceed, click the “Continue” button.
If you want to go for the option of network mirror select the yes option from the below-shown screen.
Choose a location for the Debian mirror and press enter for the next setup.
Next screens arrange the package manager.

If the system is not using a proxy server, click Continue on the following screen. If you already have it, make the changes according to your needs and continue the further process.
Press the continue button for the next setup. Then it will demand your participation in a packaging survey that is sown on the next screen, select “no” and then click “continue.”
In this step, select to install option, like desktop environments, servers, etc. So, go for the choice that is suitable for your installation.
On the available options on the next screen, click “Yes” to install Grub bootloader on the primary hard drive.
After pressing Continue, select the disc on which the Grub loader will be installed in the next window.
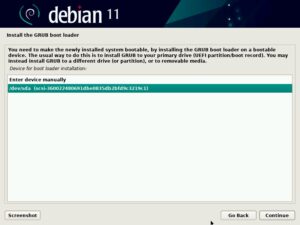
Press the continue button and finish the installation process.
After completion, the installer will prompt you to restart the computer.
The next available “continue” option will restart your system, then again transform installation media to hard disks for the boot medium.
Click Next to reboot the system. Don’t forget to change the bootable media from the installation media to the hard drive.
-
Login after installation
Following the restart of the computer, we will proceed to the Grub screen, select the first option, and press enter.
We will see the login screen when the machine first starts up. To log in, enter the local user that enter last time and all the credentials we created during installation.
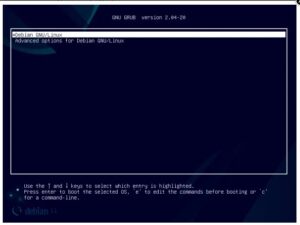
Now Debian 11 is successfully installed.
Final Thoughts
If you are currently using an older version of Debian, we recommend upgrading to take advantage of all the new improvements in Debian 11 Bullseye. There are several ways to install Debian on your computer, but the focus is on using a bootable USB drive containing the Debian ISO, which is the most convenient. You can also set up Debian 11 in a virtual machine using Virtual Box or VMware Workstation. Now you know how to install debian 11 so go and share this with your friends too.
And don’t forget to share your valuable suggestions.
